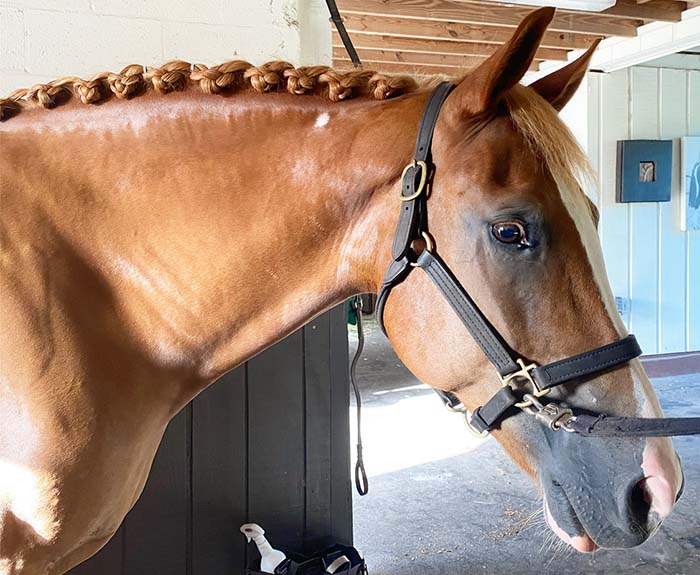
Elegant and intricate (but surprisingly easy!), reverse scallop braids are becoming increasingly popular in the dressage, jumper, and hunter pleasure arenas. These unique braids showcase your horse’s neck and performance while helping you stand out from the crowd. Reverse scallop braids can be done on any mane longer than about 5 inches long, making them popular for baroque breeds or when the mane is too short to put in a tight running braid. For a complete head-to-tail show ring ready look, refer to our tutorials on how to french braid a forelock and braid a tail.
Materials Needed
It is a good idea to collect all of your braiding tools and supplies before you begin braiding. In order to perform a reverse scallop braid job, you will need:
- Step stool or a grooming tote that you can stand on
- Aluminum pulling comb
- Mane spray (such as Quic Braid or Mane ‘N Tail Spray N Braid)
- Small sponge
- Small bucket
- Scissors
- Pull through tool or braiding hook
- Rubber elastic bands (Healthy HairCare Super Bands are popular)
As with other braiding styles, it is up to you as to whether you would like the rubber bands to match your horse’s mane color. If you want the focus on the braids, we recommend that you choose a rubber band color that matches the color of the mane. For a truly eye-catching braid job, use an elastic band in a coordinating color (such as white bands on a black or chestnut mane).
How to Reverse Scallop Braid Your Horse
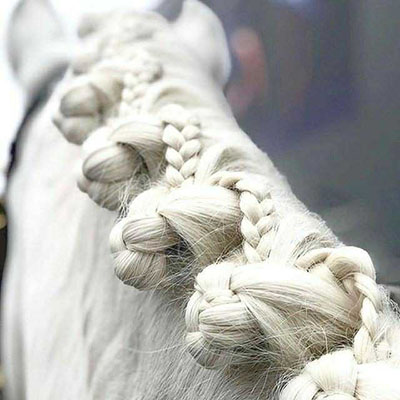
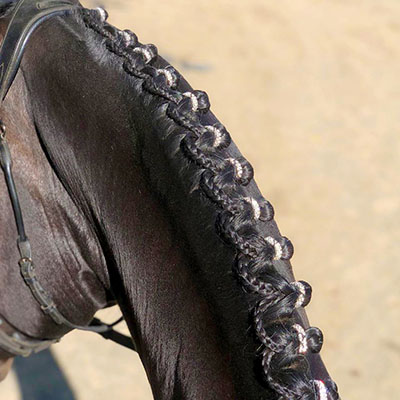
A reverse scallop braid is simple to perform but looks very complex. From one side of the horse’s neck, you will observe traditional button braids and from the other, you will see a neat scallop design along the neck. Follow these instructions to quickly braid your horse’s mane into a beautiful reverse scallop!
- Before you begin braiding the mane, it is important to prepare the mane. Start with a freshly washed mane (we recommend that you skip the conditioner, which will make the hair too smooth to handle). Then carefully brush out the mane to ensure that there are no tangles. For this braid type, the mane can lie on either side of the horse’s neck, however, it is traditionally done from the left side.
- Use the bucket and sponge to thoroughly dampen the mane, then spray with a generous amount of mane spray. This will not only make the mane easier to manipulate, but it will also prevent flyaway hairs.
- Section off the first section of the mane, directly behind the bridle path, approximately 1 inch to 1 ½ inch along the crest. When grasping the hair, you will want each section to be about the same thickness as your index finger. Try to make each braid the same thickness (you may have to section off larger or shorter sections along the crest to accommodate the natural changes).
- Braid each section tightly, keeping your thumb over the cross of the braid to maintain adequate tension. When you reach the bottom of the braid, fasten off the braid with a rubber band.
- Continue working your way down the neck, leaving the braids hanging down the neck as you complete them.
- After you have braided all the way down the neck, step off your step stool and observe the line of the rubber bands. Ideally, they should be in a straight line that follows the natural shape of your horse’s neck. It may take some finessing to make this line straight, but it is important for the overall look of the braid job.
- Go back through the braids, and, using an additional rubber band, tuck the ends of hair back up into the braid.
- Use your pull through to pull the bottom of the braid through the top of the braid on the opposite side of the crest. Work your way down the neck, pulling all the braids up and through themselves.
- Now it is time to create the scallops. Begin by pulling the end of the braid up so there is a bump about the size of your first knuckle of your thumb as the “button” on the left side of the neck and the rest of the braid hanging over the right side of the neck.
- Then, use your pull through to pull the end of the braid into the “button” of the next braid. You will want to pull it through the same hole that you used to pull the end of the braid through.
- Pinch the combined braid tightly to hold the end of the braid in the bump while you pull the end of that braid to the back of the neck.
- Secure the button braid and the end of the preceding braid together with a rubber band.
- Continue working your way down the neck, pulling the end of the previous braid into the bump of the next braid, and fastening it with a rubber band.
- At the very last braid, fold the braid over twice to create a button braid that will hold the tail of the previous braid in place.
- Use your scissors to trim any loose ends.
For additional information on how to reverse scallop braid your horse, we recommend watching this brief tutorial:
Stand out from the competition with a unique reverse scallop braid job. While it may look complicated, you will quickly discover after a bit of practice that it is simple to perform. If you have any questions regarding the reverse scallop braid process or would like personalized product recommendations to build your equine braiding kit, we invite you to speak with a member of our friendly and highly trained sales staff. You can also learn more about the various different types of mane and tail treatments in the book, Braiding Manes & Tails.