For many equestrians, body clipping a horse is an essential grooming technique, especially during the winter months when trying to keep their horses fit and active. Clipping helps remove excess hair, which can prevent the horse from sweating excessively and promotes better cooling and drying. This step-by-step guide will walk you through safely and effectively body clipping a horse as you remove the winter woolies and reveal their beautiful coat underneath!
Before You Begin
Before you start body-clipping your horse, gather all the necessary tools. Here’s what you’ll need:
- Clippers
- Clipper Blades
- Clipper Oil
- Blade Coolant
- Blade Wash
- Grooming and bathing supplies
- Extension Cords (if using corded clippers)
- Step Stool (Optional)
To learn more about the proper body clipping equipment, we encourage you to refer to our blog post, Getting Started Body Clipping.
You will also want to ensure your horse is as clean as possible. Thoroughly bathe your horse the day before clipping (giving them ample time to dry). This will remove the dirt, dander, and mud that can clog and dull the clipper blades. A clean horse makes for a faster, closer clip job and reduces the potential for clipper track marks.
Body Clipping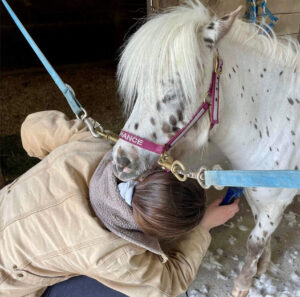
After you have gathered and assembled your tools and prepared your horse, it’s time to start clipping. Choose a quiet, well-lit, and safe environment for clipping, especially if you or your horse are nervous, or you are not an experienced clipper. Make sure that there is adequate lighting to see what you’re doing and to prevent accidents. Ensure your horse is calm and cross-tied securely, or you can ask an experienced horse person to hold the horse for you.
Step 1: Safety Precautions
Clipping a horse involves risks, so it’s crucial to take safety precautions seriously. Wear appropriate clothing: Dress in comfortable, close-fitting clothing that won’t get caught in the clippers, as well as sturdy, close-toed boots. Some equestrians also elect to wear safety glasses to protect their eyes from flying hair and debris.
If you have a tall horse, or if you think you might have issues reaching higher areas like the withers and rump, you will need a sturdy place to stand. It is important to use a stable step stool or mounting block instead of a wobbly bucket, to limit the risk of falling.
Step 2: Blade Preparation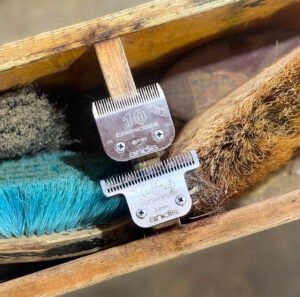
Before clipping, make sure your clipper blades are sharp and properly lubricated. Dull blades can pull hair and cause discomfort to your horse. Inspect the blades and check for any damage or dullness. If they are damaged, replace them with a new set of blades. Then, apply clipper blade oil for smooth operation; we recommend following the manufacturer’s instructions for oiling.
Step 3: Test the Clippers
Turn on the clippers and allow your horse to become familiar with the noise and vibrations. This will help reduce anxiety during the clipping process. For the truly green or nervous horse, begin by rubbing the clippers all over your horse’s body, first while turned off and then while turned on. If your horse begins acting like he could be dangerous or if he is more nervous than you are comfortable with, call the vet and ask them about coming to administer a sedative.
Step 4: Begin Clipping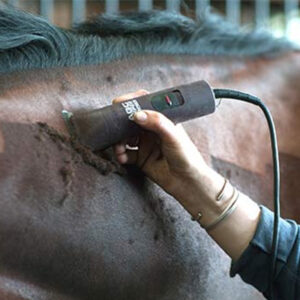
Now that everything is in place, it’s time to start clipping. Take your time and remain patient throughout the process; rushing can lead to uneven clipping and/or accidents.
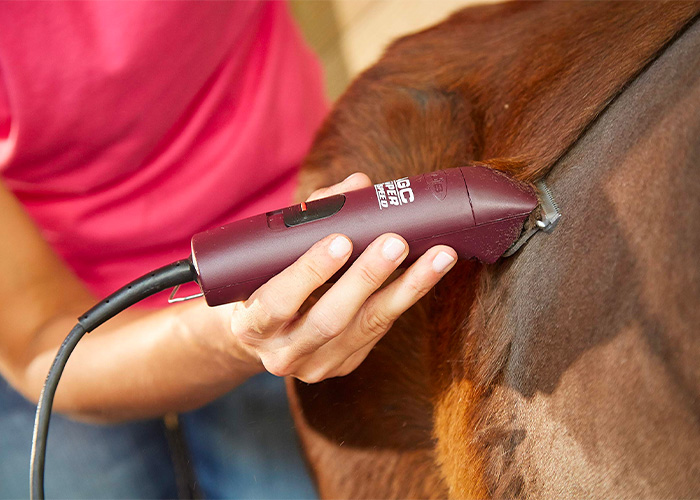
Position yourself next to your horse and start from the neck or shoulder area. Many equestrians prefer to start on the left side of the horse (the near side) because most horses are more frequently handled from this side. Hold the clippers securely but not too tightly. Maintain a firm grip without applying excessive pressure.
Begin clipping against the direction of hair growth. Use long, smooth strokes and keep the clippers flat against the skin to prevent lines or marks. Apply consistent pressure as you move the clippers for an even cut.
Mentally divide the horse’s body into sections, and work methodically to ensure you don’t miss any spots. Use a soft brush to remove clipped hair from the horse’s coat. This will help you see any missed spots and prevent the clippers from clogging.
Periodically touch the blades to check for overheating. If they become too hot, stop and allow them to cool. You can use clipper coolant or a separate set of blades if you have them. If your clippers start pulling hair or become less effective, switch to a new, sharp blade.
Step 5: Focus on Sensitive Areas
Certain areas of the horse’s body are more sensitive and require extra care. Use caution when clipping around the face and ears. You may want to switch to smaller clippers or trimmers for these areas.
You will also want to be extra gentle when clipping the legs, especially around joints and tendons. It can be painful for your horse if you hit the bone or delicate tendons and ligaments with the blade. Additionally, some horses can act ticklish when clipping the belly and groin; it is important to pay close attention to your horse’s behavior when clipping these sensitive areas. If your horse gets antsy, it is essential to go slowly and use your best judgment. Some horses learn to accept this with time and positive reinforcement (treats and praise are great!), while others may need a twitch or even sedation.
Step 6: Finishing Touches
After you’ve completed the body clipping, it’s time for the finishing touches! Inspect the horse’s coat for any missed spots or uneven areas, using the clippers to touch up as needed. Then, brush your horse to remove any remaining loose hair. Consider giving your horse a bath to fully clean and soothe their skin; a conditioning treatment can help their coat shine!
Step 7: Aftercare
Once you have finished the clip job, it’s time to offer your horse a tasty treat and plenty of praise for their cooperation during the process. After body clipping, your horse may be more susceptible to temperature fluctuations, so it is important to monitor them closely. It’s important to use appropriate blankets or sheets to keep your horse warm and comfortable, especially during cold weather, because you have taken away your horse’s natural protection from the elements. You should also monitor your horse’s body score and adjust their diet as needed to support their energy requirements in the absence of their natural coat.
Body clipping a horse is a valuable skill for any equestrian. With the right tools, preparation, and technique, you can keep your horse comfortable and looking show-ring-ready year-round! Remember to prioritize safety, be patient, and confirm that your horse is relaxed throughout the process.
At The Cheshire Horse, we carry everything you need to body clip your horse, including a full line-up of clippers and winter blankets. If you have any questions regarding the products that we carry, we invite you to reach out to a member of our friendly, experienced sales team.